NexiGo N650 handleiding
Wat zit er in de doos
1 x Quad HD-webcam
1 x Gebruikershandleiding
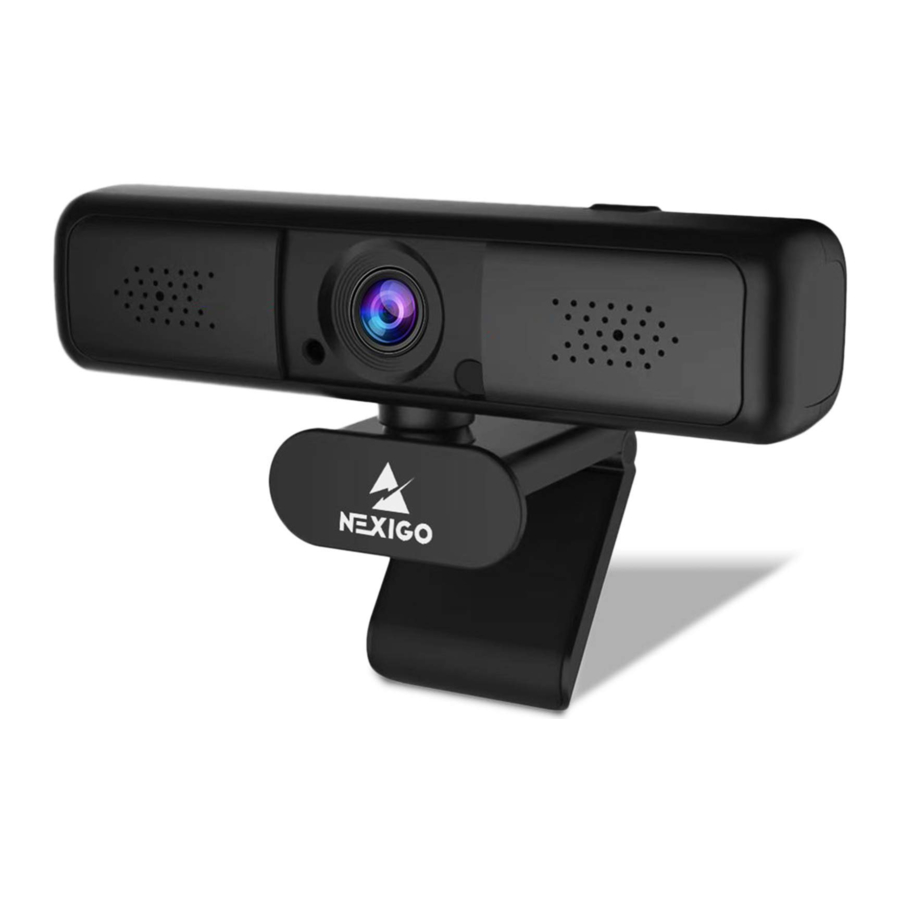
Productoverzicht

- HD-lens
- Microfoon met ruisonderdrukking
- Stroomindicator
- Privacy-sluiter
- Statiefbevestiging
- Flexibele clip/voet
- Zoomknop
Specificatie
| Videoresolutie | 2560x1440@30fps, 1920x1080@30fps, 1280x720@30fps, 640x480@30fps |
| Sensor | 1/3 inch 4.0 Megapixel GC4653-beeldsensor |
| Gezichtsveld | H=95 graden |
| Videoformaat | MJPG/H.264/YUV |
| Applicatieondersteuning | Chatsoftware: Skype, FaceTime, Zoom, Yahoo!, Messenger, Hangout Streamingsoftware: Open Broadcaster Software and Xsplit Foto of video: Gebruik de systeemcamera-app (Camera voor Windows, Photo Booth voor MAC OS) |
| Systeemvereisten |
|
Uw webcam instellen
- Plaats/positioneer uw webcam

- Sluit de webcam aan op uw computer met behulp van de USB-kabel

![waarschuwing]() Opmerking: Zorg ervoor dat u verbinding hebt met uw netwerk voordat u met de installatie begint.
Opmerking: Zorg ervoor dat u verbinding hebt met uw netwerk voordat u met de installatie begint.
![waarschuwing]() Opmerking: Als u de camera niet in andere apps kunt gebruiken, moet u toegang inschakelen.
Opmerking: Als u de camera niet in andere apps kunt gebruiken, moet u toegang inschakelen. - In Windows: Selecteer Instellingen>Privacy>Camera, schakel apps toestaan om toegang te krijgen tot uw camera in.
- Op Mac: Selecteer Apple-menu>Systeemvoorkeuren>Beveiliging & Privacy>Privacy>Camera en selecteer welke apps u wilt gebruiken met de camera.
Raadpleeg de FAQ-secties als u nog steeds problemen ondervindt bij het aansluiten van de webcam.
-
- Bekijk uw camera: Windows
Windows-gebruikers kunnen de Camera-app gebruiken, die vooraf is geïnstalleerd met het besturingssysteem. Om naar het Camera-programma te gaan, typt u camera in de zoekbalk onder aan het scherm en drukt u op enter.
U kunt ook naar de startmenuknop in de rechteronderhoek van het scherm gaan en erop klikken.
Blader door de lijst met programma's totdat u bij het gedeelte "C" komt. Camera wordt daar vermeld. Om een afbeelding van de camera in de app te zien, moet u mogelijk de camera selecteren uit de lijst met andere camera-apparaten.
Klik rechts- of linksboven in uw scherm op het camera-icoon (de pijl die zichzelf achtervolgt, niet het tandwiel) in het app-menu en blijf schakelen totdat u bij de NexiGo komt. - Bekijk uw camera: Mac
Mac-gebruikers kunnen de Photo Booth-app gebruiken, die vooraf is geïnstalleerd met het besturingssysteem.
Hiermee kunt u een voorbeeld van de camerabeelden bekijken, foto's maken en videoclips opnemen. Om te beginnen selecteert u de knop Finder, klikt u op Applicaties en start u Photo Booth.
![]()
U kunt ook op de zoekknop in uw menubalk klikken, photo booth typen en op enter drukken. Om een afbeelding van de camera in Photo Booth te zien, moet u mogelijk de camera selecteren uit de lijst met aangesloten apparaten in de app.
Klik bovenaan uw scherm op Camera in het app-menu en selecteer de Full HD camera in de lijst met opties.
![waarschuwing]() Opmerking: Focus aanpassen
Opmerking: Focus aanpassen
Webcams met handmatige focus: Afhankelijk van de afstand tussen u en de webcam is het videosignaal van de webcam mogelijk niet scherp. U kunt aan de focusring draaien om de brandpuntsafstand van de lens aan te passen. Webcams met automatische focus: Beweeg uw hand voor de camera, de webcam past automatisch de focus aan op de helderste status.
- Bekijk uw camera: Windows
- Vereisten voor videogesprekken
- Een computer met luidsprekers (of een headset), een webcam en een microfoon;
- Installeer een toepassing voor videogesprekken, zoals Skype, FaceTime, Yahoo!, Messenger, Zoom, Hangout. Evenals een USB-camera en toepassingen voor videogesprekken (beide bellers hebben dit nodig);
- Bevestig dat de persoon met wie u wilt spreken ook over de benodigde hardware beschikt en hetzelfde programma heeft geïnstalleerd.


 Opmerking: Zorg ervoor dat u verbinding hebt met uw netwerk voordat u met de installatie begint.
FAQ
Q1: How do I know if my camera is recognized by the operating system? (Hoe weet ik of mijn camera wordt herkend door het besturingssysteem?)
A: Connect the camera to any USB2.0/3.0 port. (Sluit de camera aan op een USB2.0/3.0-poort.) It will take a few seconds for the camera to be recognized after it is connected to the laptop. (Het duurt een paar seconden voordat de camera wordt herkend nadat deze op de laptop is aangesloten.) To ensure the camera has installed correctly, check under Control Panel > System and Security > Device Manager (Configuratiescherm > Systeem en beveiliging > Apparaatbeheer).

To verify connectivity on Mac, click the Apple Menu (Apple-menu) (in the top left corner of your screen) and then click About this Mac (Over deze Mac). Click on System Report (Systeemoverzicht) from the pop-up window that appears. The System Information window for your Mac will appear. (Het venster Systeeminformatie voor uw Mac verschijnt.) Navigate to the USB section and check if the webcam is listed as a connected device (like the photo below): (Navigeer naar het USB-gedeelte en controleer of de webcam wordt vermeld als een aangesloten apparaat (zoals op de foto hieronder):)

Q2: How can I use my webcam to record a video? (Hoe kan ik mijn webcam gebruiken om een video op te nemen?)
A: For Mac OS
Please open the Photo Booth video recording application that comes with the Mac OS system to start recording videos, taking photos or testing the webcam. (Open de Photo Booth-videotoepassing die bij het Mac OS-systeem wordt geleverd om video's op te nemen, foto's te maken of de webcam te testen.)
There are three primary icon buttons of the Photo Booth: "continuously take four photos" ("continu foto's maken"), "take a photo" ("een foto maken") and "video recording" ("video opnemen"). In photo mode the middle button acts as a shutter button, press it to take a photograph. (In de fotomodus fungeert de middelste knop als een ontspanknop, druk erop om een foto te maken.) In video capture mode, press it to start recording and press it again to stop recording. (In de video-opnamemodus drukt u erop om de opname te starten en drukt u er nogmaals op om de opname te stoppen.)
For Windows 8/10 System:
Search "Camera" (Camera) in the search bar of the "Start" (Start)-menu and click the "Camera" (Camera) application to preview, record a video and test the camera. If you need to record a better quality video, you can download and install the AMCap video recording program (download address: https://amcap.en.softonic.com/).
If you have more than one webcam installed, or if the image does not appear immediately, open the "Devices" (Apparaten) menu in AMCap and select "Full HD Webcam" (Full HD-webcam) from the list. At the same time, make sure to select the microphone "USB Live Camera Audio" (USB Live Camera Audio). The video signal of the webcam will be displayed on the AMCap screen. (Het videosignaal van de webcam wordt weergegeven op het AMCap-scherm.) Please do not open multiple AMCap interfaces, this may distort the video or audio. (Open niet meerdere AMCap-interfaces, dit kan de video of audio vervormen.)
Q3: What is the video recording frame-rate? (Wat is de frame-rate voor video-opname?)
A: The NexiGo Webcam captures crystal clear images and can record up to 1440p/ 30fps video in a well-lit environment. (De NexiGo-webcam legt kristalheldere beelden vast en kan video's tot 1440p/30fps opnemen in een goed verlichte omgeving.) This can be affected by low bandwidth availability or low light levels, which can drop the frame rate down to 20fps or lower. (Dit kan worden beïnvloed door een lage bandbreedtebeschikbaarheid of lage lichtniveaus, waardoor de frame-rate kan dalen tot 20 fps of lager.)
Q4: Why my NexiGo webcam cannot record any sound? Why do I hear echoes during video calls? (Waarom kan mijn NexiGo-webcam geen geluid opnemen? Waarom hoor ik echo's tijdens videogesprekken?)
A: In Windows: Go to Control Panel > Sound. (Ga naar Configuratiescherm > Geluid.) Select the NexiGo webcam as the default communication device for playback and recording. (Selecteer de NexiGo-webcam als het standaardcommunicatieapparaat voor afspelen en opnemen.)

On Mac: Go to System Preferences > Sound. (Ga naar Systeemvoorkeuren > Geluid.) Select NexiGo webcam as the default device for sound input and output. (Selecteer de NexiGo-webcam als het standaardapparaat voor geluidsinvoer en -uitvoer.)
In your video/audio calling application, check the audio settings and make sure that the NexiGo webcam is selected for both the speaker and microphone. (Controleer in uw video-/audio-oproeptoepassing de audio-instellingen en zorg ervoor dat de NexiGo-webcam is geselecteerd voor zowel de luidspreker als de microfoon.) Then, check the video settings and verify that NexiGo webcam is selected for the camera. (Controleer vervolgens de video-instellingen en controleer of de NexiGo-webcam is geselecteerd voor de camera.)
Q5: What can I do if the image shows abnormal color? How to adjust my image parameter, such as brightness or contrast? (Wat kan ik doen als het beeld een abnormale kleur vertoont? Hoe pas ik mijn beeldparameter aan, zoals helderheid of contrast?)
A: Please ensure that the light in your environment is free of unique tones or intense light, such as walls/floors/other large-area non-standard light environments, including areas with green/blue/intense light. (Zorg ervoor dat het licht in uw omgeving vrij is van unieke tinten of intens licht, zoals muren/vloeren/andere niet-standaard lichtomgevingen in grote ruimtes, inclusief gebieden met groen/blauw/intens licht.) In such environments photographed pictures are subjected to color cast due to the lighting impact. (In dergelijke omgevingen worden gefotografeerde foto's onderworpen aan kleurzweem als gevolg van de impact van de verlichting.)
For Windows:
Skype:
Click Settings (Instellingen), select Audio & Video (Audio en video), then click Webcam settings. (Webcaminstellingen.)

You can adjust any image parameter you want according to your needs. (U kunt elke beeldparameter aanpassen die u wilt, aan uw behoeften.)

AMCap:
Click Options (Opties), select Video Device (Videoapparaat), then click Properties (Eigenschappen).

You can adjust any image parameter you want according to your needs. (U kunt elke beeldparameter aanpassen die u wilt, aan uw behoeften.)

PotPlayer:
Please download PotPlayer software on your computer and add this camera to it. (Download de PotPlayer-software op uw computer en voeg deze camera eraan toe.) While using this camera to stream video on the PotPlayer click the Settings button, then adjust the Brightness or other image settings. (Klik tijdens het gebruik van deze camera om video te streamen op de PotPlayer op de knop Instellingen en pas vervolgens de Helderheid of andere beeldinstellingen aan.) You can then use another type of software to start a video call and the changes will carry over. (U kunt dan een ander type software gebruiken om een videogesprek te starten en de wijzigingen worden doorgevoerd.)
Q6: What should I do if my Windows 7 computer says a driver is needed/ the webcam is not plug & play? (Wat moet ik doen als mijn Windows 7-computer zegt dat er een stuurprogramma nodig is/de webcam geen plug & play is?)
A: Unfortunately, as Windows 7 is no longer supported by Microsoft your PC may state that a driver is needed or the device not recognized. (Helaas, aangezien Windows 7 niet langer wordt ondersteund door Microsoft, kan uw pc aangeven dat er een stuurprogramma nodig is of dat het apparaat niet wordt herkend.) Please test the webcam directly in Skype/ Zoom. (Test de webcam rechtstreeks in Skype/Zoom.)
If it does not pull up in either of these apps it will not work on this system. (Als het in geen van beide apps wordt weergegeven, werkt het niet op dit systeem.)
Q7: Why does the microphone still not work even though it is being recognized by my Computer? (Waarom werkt de microfoon nog steeds niet, ook al wordt hij herkend door mijn computer?)
A: This could mean there is a communication issue happening between the camera and your computer. (Dit kan betekenen dat er een communicatieprobleem is tussen de camera en uw computer.)
Navigate to Computer Management > Device Manager > Sound, video and game controllers, (Navigeer naar Computerbeheer > Apparaatbeheer > Geluids-, video- en gamecontrollers,) and click to expand the menu. (en klik om het menu uit te vouwen.) Locate the HD Webcam USB option, right-click and select "Uninstall device" ("Apparaat verwijderen").

Once the webcam has been uninstalled, unplug the USB cord from your computer, wait one minute, and then plug it back into the USB port. (Zodra de webcam is verwijderd, koppelt u het USB-snoer los van uw computer, wacht u een minuut en steekt u het vervolgens terug in de USB-poort.) The webcam will automatically install the new driver when it is reinstalled. (De webcam installeert automatisch het nieuwe stuurprogramma wanneer deze opnieuw wordt geïnstalleerd.) Wait one more minute, and then verify if the microphone is working properly. (Wacht nog een minuut en controleer vervolgens of de microfoon correct werkt.)
Q8: How can I use my webcam in chatting software, like Skype or FaceTime? (Hoe kan ik mijn webcam gebruiken in chatsoftware, zoals Skype of FaceTime?)
A: For FaceTime on Mac:
If your Mac has a built-in camera already, open the FaceTime, click Video (Video) on the top left of your screen, and choose the name of your webcam to use it. (Als uw Mac al een ingebouwde camera heeft, opent u de FaceTime, klikt u op Video linksboven in uw scherm en kiest u de naam van uw webcam om deze te gebruiken.)

For Skype on Mac:
Before running Skype, please make sure that all other applications using the webcam are closed. (Voordat u Skype uitvoert, moet u ervoor zorgen dat alle andere toepassingen die de webcam gebruiken, zijn gesloten.) Failure to do so may mean that Skype will not recognize the webcam. (Als u dit niet doet, kan dit betekenen dat Skype de webcam niet herkent.) It is also highly recommended to update Skype to the latest version as this can affect the connection as well. (Het wordt ook ten zeerste aanbevolen om Skype bij te werken naar de nieuwste versie, omdat dit ook de verbinding kan beïnvloeden.) Once you have started it select Preferences from the Skype menu in the top left corner of your screen (like the photo below). (Zodra je het hebt gestart, selecteer je Voorkeuren in het Skype-menu in de linkerbovenhoek van je scherm (zoals op de foto hieronder).)

In the Audio/ Video (Audio/Video) tab, select the name of your webcam in the Camera (Camera) drop down menu. (Selecteer op het tabblad Audio/Video de naam van uw webcam in het vervolgkeuzemenu Camera.)

For Skype on Windows 10:
Step 1. (Stap 1.) In the Skype for Business main window, click the arrow next to the Options button, and select Tools > Audio Device Settings (Extra > Audioapparaatinstellingen).

Step 2. (Stap 2.) Under Audio Device (Audioapparaat) Settings choose the device you want. (Kies onder Audioapparaatinstellingen het gewenste apparaat.)

Step 3. (Stap 3.) Click the green arrow next to the Speaker (Luidspreker) icon to hear a sample tone, and drag the slider if you need to adjust the volume. (Klik op de groene pijl naast het luidsprekerpictogram om een voorbeeldtoon te horen en sleep de schuifregelaar als u het volume wilt aanpassen.)
Step 4. (Stap 4.) To test your microphone volume, speak into it for a few seconds. (Om uw microfoonvolume te testen, spreekt u er een paar seconden in.) The volume is optimal when the progress bar reaches the middle of the test area. (Het volume is optimaal wanneer de voortgangsbalk het midden van het testgebied bereikt.) Drag the slider next to Microphone (Microfoon) to adjust the microphone volume. (Sleep de schuifregelaar naast Microfoon om het microfoonvolume aan te passen.)
For Zoom
When you first join a meeting, Zoom will work to test your speakers automatically. (Wanneer u voor het eerst aan een vergadering deelneemt, zal Zoom uw luidsprekers automatisch testen.) If you don't hear the ringtone use the drop-down menu or click No to switch speakers until you do hear the ringtone. (Als u de beltoon niet hoort, gebruikt u het vervolgkeuzemenu of klikt u op Nee om van luidspreker te wisselen totdat u de beltoon hoort.) Click Yes (Ja) to continue to the microphone test. (om door te gaan naar de microfoontest.)

Next, Zoom will ensure you can be heard by others by testing your connected microphone. (Vervolgens zorgt Zoom ervoor dat u door anderen kunt worden gehoord door uw aangesloten microfoon te testen.) Speak into the mic when prompted to do so, if you don't hear your audio repeated back use the drop-down menu, or click No (Nee), to switch microphones until you hear the replay. (Spreek in de microfoon wanneer u daarom wordt gevraagd, als u uw audio niet herhaaldelijk terughoort, gebruikt u het vervolgkeuzemenu of klikt u op Nee om van microfoon te wisselen totdat u de herhaling hoort.) Click Yes (Ja) when your microphone is set up. (wanneer uw microfoon is ingesteld.)

Click Join with Computer Audio (Deelnemen met computeraudio) to finish testing and join the meeting. (om het testen te voltooien en deel te nemen aan de vergadering.)

Q9: Why is my video not in 1440p in my video calling application? (Waarom is mijn video niet in 1440p in mijn video-oproeptoepassing?)
A: Check the video output settings in your video capture software, these may be set to a lower capture format. (Controleer de video-uitvoerinstellingen in uw video-opnamesoftware, deze kunnen zijn ingesteld op een lagere opname-indeling.) There are various constraints on the system that could impede the ability to attain a 1440p video calling session. (Er zijn verschillende beperkingen op het systeem die het vermogen om een 1440p-videogespreksessie te bereiken, kunnen belemmeren.) They center around processing power (i.e. (dat wil zeggen) CPU speed) and available network bandwidth. (en beschikbare netwerkbandbreedte.) In all cases, review the requirements from the video calling application. (Bekijk in alle gevallen de vereisten van de video-oproeptoepassing.) They will guide as to the system performance required as well as the necessary bandwidth. (Ze zullen u begeleiden met betrekking tot de vereiste systeemprestaties en de benodigde bandbreedte.)
Q10: Why is there flickering or banding on the video feed when I use the webcam? (Waarom is er flikkering of banding op de videofeed wanneer ik de webcam gebruik?)
A: This might be due to lighting inconsistencies in your room. (Dit kan te wijten zijn aan inconsistenties in de verlichting in uw kamer.) To resolve this, open the video control panel on your video capture software and change the frequency response rate to either 50Hz or 60Hz, depending on your region. (Om dit op te lossen, opent u het videobedieningspaneel op uw video-opnamesoftware en wijzigt u de frequentierespons naar 50 Hz of 60 Hz, afhankelijk van uw regio.)
The camera defaults to indoor mode. (De camera staat standaard in de binnenmodus.) Please do not aim the camera at the light source directly. (Richt de camera niet rechtstreeks op de lichtbron.)
Q11: Does my webcam support the Linux Operating System? (Ondersteunt mijn webcam het Linux-besturingssysteem?)
A: Linux is supported if your Linux distro has UVC drive-free protocols. (Linux wordt ondersteund als uw Linux-distributie UVC-stuurprogrammavrije protocollen heeft.) Otherwise, you will have to install Linux UVC drivers manually. (Anders moet u Linux UVC-stuurprogramma's handmatig installeren.)
Q12: Why does my screen go blank or black while trying to preview images? (Waarom wordt mijn scherm leeg of zwart tijdens het proberen afbeeldingen te bekijken?)
A: There are several reasons this could happen; (Er zijn verschillende redenen waarom dit kan gebeuren;)
- The NexiGo webcam uses H.264 encoding, as PC systems are generally not supportive of H.264 decoding the screen will go blank or black when previewing using certain previewing software (e.g. (bijv.) AMCap) which is not supportive of H.264 decoding. (De NexiGo-webcam gebruikt H.264-codering, aangezien pc-systemen over het algemeen geen H.264-decodering ondersteunen, wordt het scherm leeg of zwart bij het bekijken met behulp van bepaalde preview-software (bijv. AMCap) die geen H.264-decodering ondersteunt.) please download a video previewing application supportive of H.264 decoding. (download een videovoorbeeldtoepassing die H.264-decodering ondersteunt.)
- There is something wrong with the USB port. (Er is iets mis met de USB-poort.) Please change to a different USB port or another PC and test the camera again. (Ga naar een andere USB-poort of een andere pc en test de camera opnieuw.)
- The PC does not recognize the camera device. (De pc herkent het camera-apparaat niet.)
- The operating system and computer configuration do not satisfy the requirements of the camera. (Het besturingssysteem en de computerconfiguratie voldoen niet aan de vereisten van de camera.)
- The video preview feature of the application is not turned on, or the privacy feature prohibits access to the camera. (De videovoorbeeldweergave van de applicatie is niet ingeschakeld of de privacyfunctie verbiedt toegang tot de camera.)
Q13: How to use the webcam privacy shutter? (Hoe gebruik je de privacy-sluiter van de webcam?)

A: The privacy shutters are in front of the webcam lens, slide the shutters left/right, and the lens will be opened/closed. (De privacy-sluiters bevinden zich voor de webcamlens, schuif de sluiters naar links/rechts en de lens wordt geopend/gesloten.)
Q14: Why the microphone volume is too low? (Waarom is het microfoonvolume te laag?)
A: Make sure that the NexiGo webcam is connected correctly to your computer. (Zorg ervoor dat de NexiGo-webcam correct is aangesloten op uw computer.)
Make sure that the NexiGo webcam is positioned correctly. (Zorg ervoor dat de NexiGo-webcam correct is gepositioneerd.)
For Windows 10:
Step 1. (Stap 1.) Go to Settings> System> Sound. (Ga naar Instellingen > Systeem > Geluid.)

Step 2. (Stap 2.) In Input (Invoer), ensure your microphone is selected under Choose your input device (Kies uw invoerapparaat), then select Device Properties (Apparaateigenschappen).

Step 3. (Stap 3.) On the Levels tab of the Microphone Properties window, adjust the Microphone (Microfoon) and Microphone Boost sliders (Microfoonversterking), as needed, then select OK (OK).

Step 4. (Stap 4.) Speak into your microphone and check under Test your microphone (Test uw microfoon) to make sure your settings work. (om er zeker van te zijn dat uw instellingen werken.)
Contactgegevens
Tel: +1(458) 215-6088
Website: www.nexigo.com
Als u problemen ondervindt, kunt u op elk moment contact met ons opnemen via cs@nexigo.com voor verdere assistentie.
Deze webcam valt onder onze royale fabrieksgarantie van 1 jaar. Bezoek www.nexigo.com voor volledige garantie-informatie.
Referenties
Download handleiding
Hier kunt u de volledige pdf-versie van de handleiding downloaden. Deze kan aanvullende veiligheidsinstructies, garantie-informatie, FCC-regels, enz. bevatten.
Download NexiGo N650 handleiding


